Friday, November 20, 2009

Recipe - Guatemalan Banana Pancakes

Barry and I just got back from a month-long rotation in Guatemala. It was wonderful and exhilirating in so many ways, and not at all what I expected. First we spent two weeks in Quetzaltenango (also known as Xela (Shay-la) ) learning Spanish. We met some amazing people and traveled to some of Guatemala's hidden treasures, like high altitude hot springs and an active volcano nestled among the jungle highlands.
.....
Antigua, the former capital, was filled with ruined cathedrals dating back to the 16th centry, georgeous volcano-backed views, and many oddities.


In Xela we investigated the local foodie scene with our roommate Alex. This was our FAVORITE taco stand, which sadly we only discovered a few days before leaving. Best. Tacos. In the world.


The next two weeks of our trip were spent in Santa Cruz, a nearly vertical town of a few thousand native Guatemalans tucked away in a cozy ring of villages circling Lake Atitlan. It looked like Utopia, but the people lived in horrible poverty and had almost no access to healthcare. We worked with Dr. Sinkinsin, an American ER doc who opened a clinic at the lake 5 years ago with his wife Carmen, a Guatemalan pediatrician. They travel by boat two days a week to other towns around the lake and provide healthcare to whoever shows up. In tow they bring a nurse, three Spanish-to-native language translators, and however many students happen to be working with them at the time.
.

Barry and I could see patients on our own (using our fabulous medical spanish and much arm gesturing), discuss cases and treatment with one of the docs, get the medicine on our own from the pharmacy (the suitcases full of meds we brought with us), and administer them ourselves. It was like nothing I've ever done before. Incredible.
.
Here's a brief glimpse of the gorgeous lake...


We stayed at a place called La Casa Rosa. Our place had a little kitchen with a mini fridge, stove top and a sweet little view of the garden.


We spent our first weekend at the lake with our UVA/Guatemala coordinator, Jessica. She took us to her favorite breakfast joint where we ate the most delicious banana pancakes (in Guatemala they're called panqueques). Since we were on our own for three meals a day we decided to give them a try.
.
Ingredients:
1 cup of pancake mix
1/2 cup of water
1 egg
1 tsp of sour cream (optional)
1 tsp butter
1 banana
butter & syrup

1. Let me start out by saying that cooking in Guatemala is quite an experience. Before you can cook anything you have to take a boat to the main town, hike up to the grocery store, trek everything back to the boat and hold onto it tightly for the harrowing trip back. From the camp stove that nearly caught fire whenever we lit the big burner, to the algae bloom at the lake requiring us to only use bottled water, to the many, many, many bugs, every day provided us with new and unusual challenges. But often in a good way.

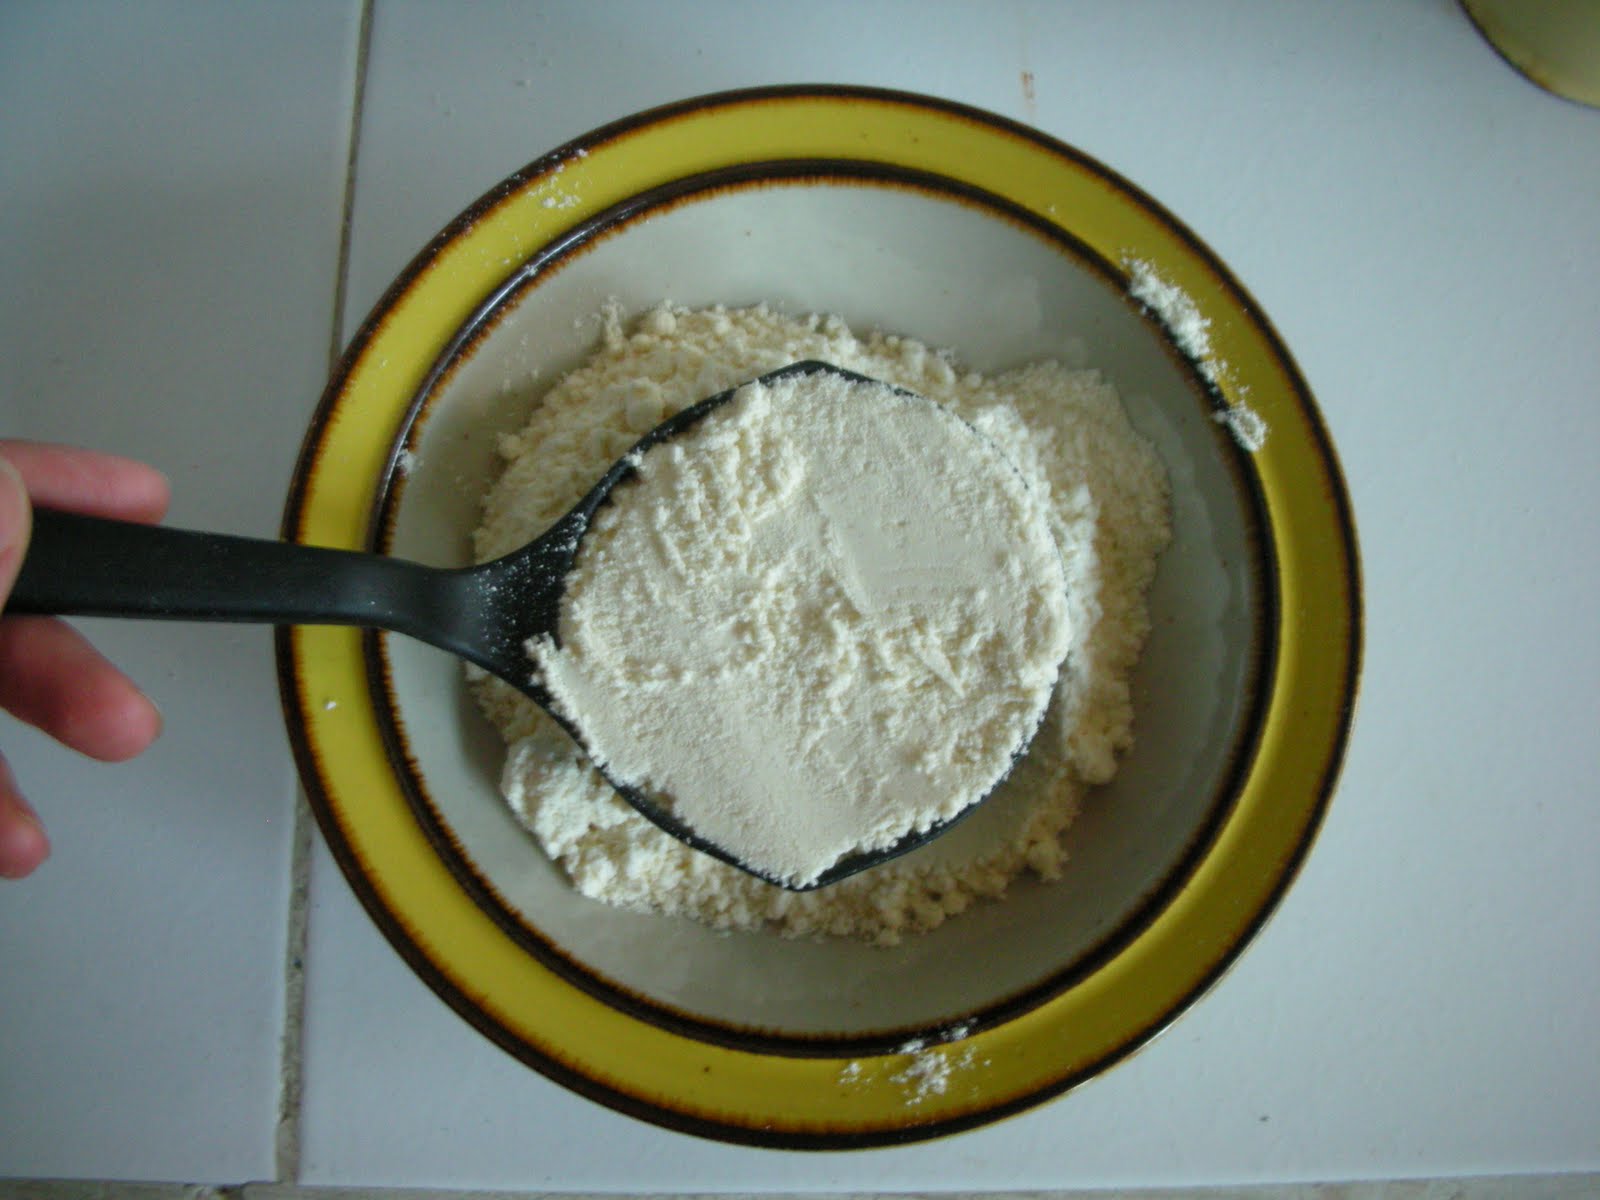
We didn't have measuring cups so I used a soup ladle to measure mix and water (2:1 ratio). It worked ok, but you'd probably be better off following the instructions on the box.


2. After combining the mix, water and egg, I decided to add a little sour cream. There is a story behind the sour cream but I will wait for another recipe to tell it.


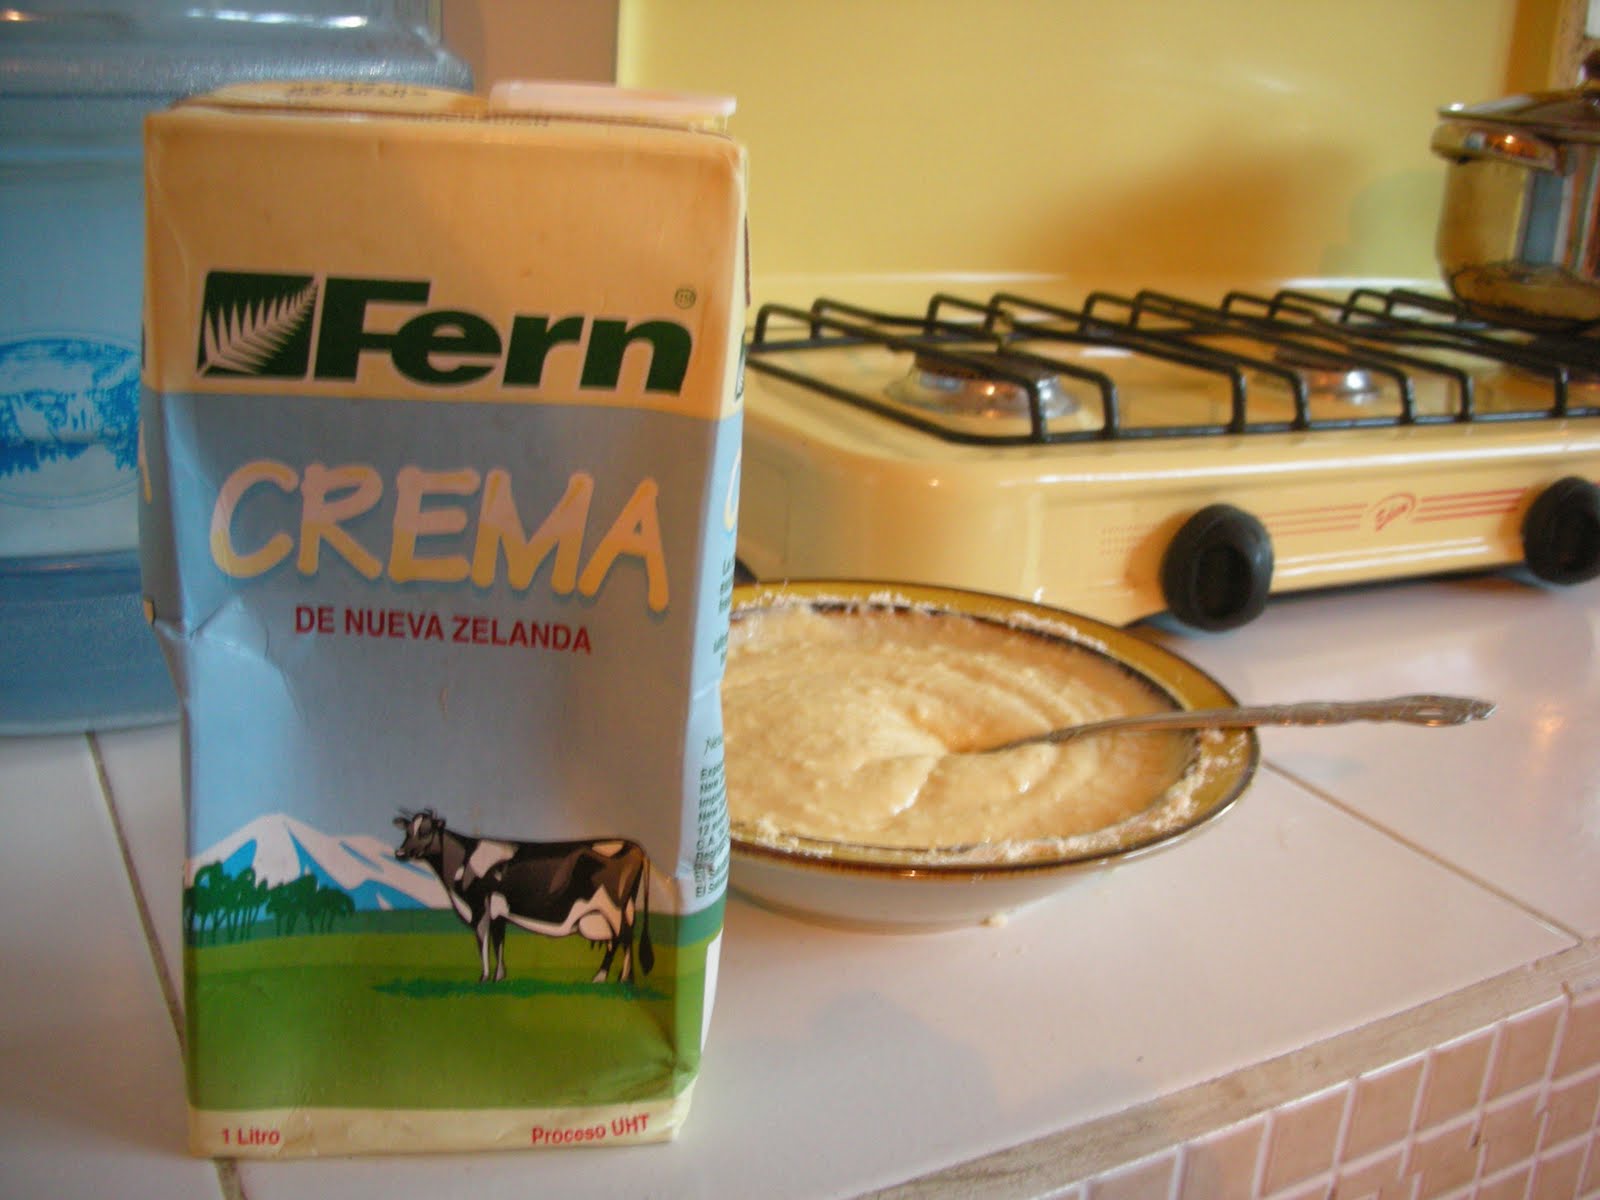
3. I don't know how well this picture conveys the batter consistency... It shouldn't be too runny or too stiff. Adjust accordingly.


4. Now, heat a small pat of butter in a pan over low-medium heat. Once it's hot add enough batter for your first pancake.


5. Slice your banana at an angle so you get oblong pieces. While the pancake is cooking, add a few slices to the still-batter side.


6. Carefully flip your pancake over onto the banana side. It will take about 2 minutes to really cook. I have heard you're only supposed to cook a pancake once on each side but I usually toss them back and forth a couple of times to make sure they're cooked through. You'll know they're done when they bounce a little bit as you flip them.


7. Double time!


9. Serve with butter and syrup, or whatever you prefer! These are already one of my favorites.....

10. Yum!

Monday, October 5, 2009

Recipe - Sweet Soy Tofu

During a recent trip to the Asian grocery store to buy soy sauce I decided to go out on a limb and get tofu. I've never cooked tofu before and had no idea what to do with it, but Barry came to the rescue!

Ingredients:
1 carton of tofu
1/2 cup + 1 Tbs sweet soy sauce (syrup)
1/4 cup water
1/4 cup olive oil + enough to fry the tofu
1 tsp sugar
4 green onions
3 cloves of garlic
3 carrots
1 cup frozen green beans (Trader Joes)
2 cups cooked white rice

1. First the marinade. I've never bought this soy sauce before and was surprised to find out it has a consistency more like maple syrup than the regular stuff. It has a balance of sweet and savory with rich, complex flavors, so this sauce will add depth to whatever you use it in. What a find!

Manis Sedang Export Quality Medium Sweet Soy Sauce 20.9 oz, Indonesia


Combine 1/2 cup of soy sauce with 1/4 cup water and 1/4 cup of olive oil. If you want to use regular soy sauce you can omit the water. Add 1 tsp sugar and whisk to combine. For this type of marinade I like to keep the garlic fairly large but you are free to cut it however you like.


2. Chop four green onions and add to the marinade. Technically you won't be using the marinade until the final stages but making it first will allow the flavors to really meld.


3. Next the side dish. My friend Vivek's grandmother always sends him home with amazing leftovers and I noticed she cuts green beans into tiny little pieces. I loved green beans already but this new use for them is definitely worth trying, it really changes the character of the dish. I like Trader Joe's green beans because they're so delicate. No need to defrost first, just cut into tiny pieces and set aside.


I cut the carrots at a diagonal so they wouldn't fall apart with all the tossing and stirring.


4. Heat 1 Tbs of olive oil in a sautee pan over medium heat and add 1 clove of finely minced garlic. After a minute or two add the carrots. Stir them regularly so they don't burn or caramelize. When the carrots begin to soften you can add the green beans.


5. When your vegetables are as soft as you want them add 1 Tbs of soy sauce and toss to coat evenly. I'm not sure the action in this shot came through, but tossing vegetables in the pan is a great way to distribute everything evenly and it's a lot of fun! I highly recommend it.


6. Next the tofu. Barry followed one of his sister's recipes which goes something like this.
.
Cut the tofu into cubes
.
Fry in oil until crispy brown. We used olive oil but I'm sure there are better fry oils out there.
.

Dry briefly on a paper towel.
.
Transfer carefully to the marinade and let stand for a few minutes.

Then pour everything into a pan and heat another few minutes to concentrate the flavor.
.


7. Serve with rice and enjoy!


Philosophy - The Role of Focus

But you can catch yourself entertaining habitually certain ideas and setting others aside; and that, I think, is where our personal destinies are largely decided.

-Alfred North Whitehead

In her book "Rapt: Attention and the Focused Life," Winifred Gallagher argues that much of the quality of your life depends not on your personal circumstances or what fate brings your way, but on what you choose to pay attention to. You selectively focus on particular elements of the world at the expense of other details, and your mind and behaviour appropriately conform to the shape of your attention. This process subtly redirects your life, influencing your career, your location, your relationships and your interests. Interestingly, the same process also influences your attitude and quality of life. Someone who can spin a snowstorm into a pleasant opportunity to stay home and enjoy themselves is going to have a very different outlook on life than someone who seizes the chance to complain about inclement weather.

Thursday, October 1, 2009

Recipe - Chilled Cucumber and Artichoke Soup

The inspiration for this soup came at 1am last night when I could not sleep (thank you very much, upstairs neighbors). I was thinking of what I could make with some of the leftover ingredients that have been hanging out in the fridge the last few weeks. My mom used to always make "clean out the ice box" dinners, which I thought was very June Cleaver of her. So in the spirit of my mom here is a yummy soup made from a mishmosh of leftover ingredients.

Ingredients:
1/2 onion
2 cloves of garlic
1 bunch of celery (or most of a bunch)
1/2 can of artichoke hearts
1 can of chicken broth
1 small tub of sour cream
3 Tbs olive oil
1/2 Tbs butter
1 tsp celery seed
2 cups raw spinach
1 tablet of vitamin C
Salt and Pepper to taste

1. I like to cut everything up before getting started. That way you're not in a mad dash to chop the last of the celery while your garlic is buring. First the onion.


2. Next, garlic. I used to have one of those handy garlic presses but it broke so now I just chop each clove into tiny pieces. The press would probably be better but I haven't bothered to get a new one.


3. Next the celery. I have a warm place in my heart for celery. When my dad was growing up he lived in Sanford, FL, where they grew so much celery the town was named the Celery Capital of the United States. Farmers would cut off the tops of each bunch before sending the celery to market, so there would be huge piles of celery tops leftover. My dad and his brothers loved to climb up a ladder and jump into the celery leftovers. Hey says they always turned bright green and they got in trouble every time, but it was such fun they couldn't resist.


4. You can use as many artichoke hearts as you like. I ended up using 4, cut into quarters.


5. Once you've chopped everything up you're ready to go. Heat the butter and 1 Tbs of olive oil over medium heat.


6. First add the garlic. Let it cook for about a minute before adding the onion.


7. When your onions are nice and translucent add the celery.


8. Sautee the celery 5-6 minutes or until it starts to look slightly translucent before adding the artichokes.


9. Add a few shakes of celery seed and sautee until everything has roughly the same yellowish green color. About 10 minutes.


10. Turn off the heat and use a food processor to homogenize your mixture. This food processor is tiny so I had to do it in small batches.
.


11. At this point I wasn't too sure what the next step was going to be. Lucky for me my friend Jim stopped by and asked what I was doing.

Melly - "making soup!"
Jim - "it looks like a French bolognese sauce"
Melly - "a what?"
Jim - "French bolognese. You put the vegetables back in the pot with some olive oil and cook for a long time, letting the bottom burn a bit before you mix it. It adds some nice caramelized flavor."
Melly - "a what?"

Thanks Jim for the awesome advice. Put 2 Tbs of olive oil into a stock pot over medium heat. Then add your processed vegetables and spread into a single layer.


12. Don't stir the vegetables until they've had some time to brown! Say 5 minutes or so. This took a lot of self control but was completely worth it.


13. Here's the fun part. When I was dreaming up this soup in the wee hours of the morning I envisioned a beautiful, bright green masterpiece. But as you can see from the pictures, our soup is more of a yellowy brown. So I thought I would borrow some fabulous advice from Food Network and green up our soup. With spinach! Use the food processor to finely mince 2 cups of spinach. To keep the beautiful bright green color you can use a pinch of powdered vitamin C. The antioxidant properties keep it from changing color. I ground up a tablet in a coffee grinder but you can also use a mortar and pestle. I added the powder right to the spinach before processing.


14. Once your spinach looks like this, put it all back in the food processor. Then add all of your soup. What once took 4 batches now all fits into one. Because everything has already been through the processor once, it should now blend more smoothly into a thick paste. When you're done put it back in the original pan (but wipe it with a paper towel first so there are no leftover big pieces).


15. What you end up with is pure gold! It may not look good right now but just you wait, it's about to be beautiful. First add the can of chicken broth. Use a whisk to combine it so you break up all the small pieces of condensed goodness.
.
This is a good time to add salt and pepper. Or if you added some before, taste and adjust. The chicken broth will add some salt but you may need more than you think.

16. Finally, the sour cream. This will add significantly to the flavor of the soup but may mask some of the original artichoke/celery flavor, so you may want to add it one dollop at a time. Whisk to make sure there are no rogue clumps of soup or sour cream.


17. You can serve this soup warm if you like, but I think it's lovely served cold.


18. Bon appetit!